| PDF FILE - CLICK HERE FOR PRINTABLE WORKSHEET |
| PDF FILE - ANSWERS TO THE WORKSHEET ABOVE |
| PDF FILE - CLICK HERE FOR PRINTABLE WORKSHEET TWO |
| YouTube Video - Introduction to Orthographic Drawing |
 |
| Orthographic drawing is
a way of drawing a three dimensional object. Normally the object is drawn
as three separate, related views - Front View, Side View and Plan View.
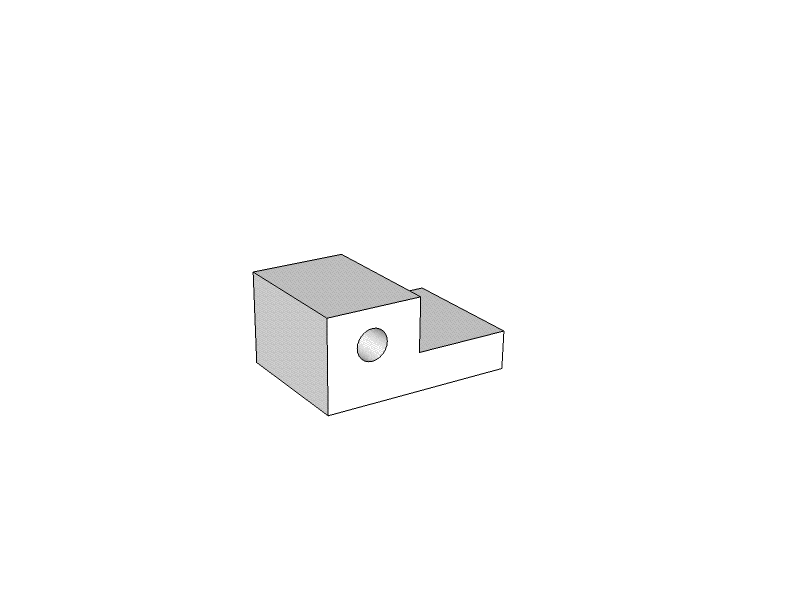
The example below shows a simple shaped block, with a hole drilled all the way through. The front view, is a drawing of the block, as if you are looking directly at the front of the object. The side view, is a drawing of the block, when it has been rotated so that one of its sides is now directly in view. The plan view, is a ‘birds eye’ view, from above. Dotted lines represent ‘hidden detail’. In this case they represent the hole, through the block/object. |
 |
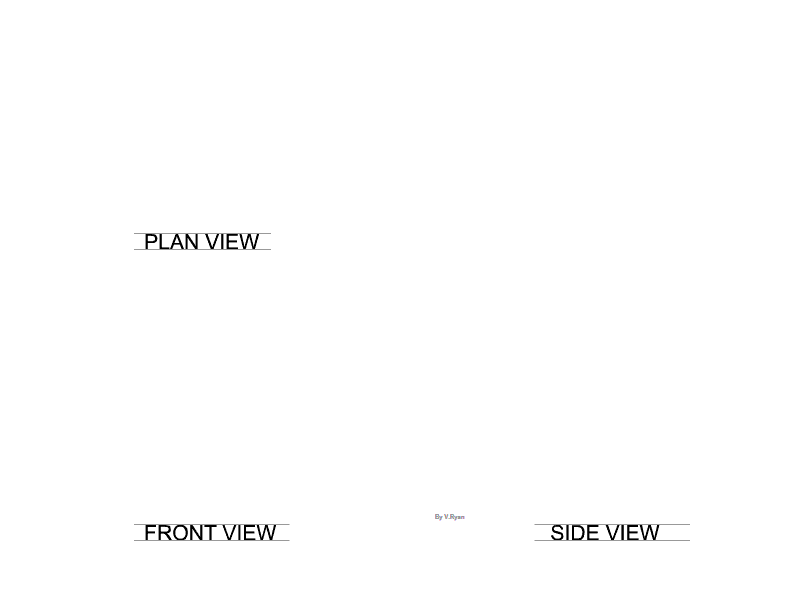
| The front, side and
plan views are arranged in the positions shown below. They must be drawn
accurately. Draw the front view first, followed by the side view. The plan view is drawn directly above the front view. Note, a 45 degree line allows the projection of the side view to the plan view. |
 |
| Dimensions (measurements) are added to the completed views. Usually six dimensions are added. This enables anyone looking at the orthographic drawing, to work out the overall size of the object. More dimensions can be added if necessary. Dimensions are drawn on each of the views. |
 |
| CLICK HERE FOR DESIGN PROCESS INDEX PAGE |