| CLICK HERE FOR INDEX PAGE |
| |
| PAINT SPRAYING OF PLASTICS INCLUDING RUBBERISING SPRAY |
V.Ryan © 2019 |
| |
| PDF FILE - CLICK HERE FOR PRINTABLE WORKSHEET |
| |
| 1. Abrade the surface with wire wool or an alternative fine abrasive, to ensure the surface is capable of taking paint. A slightly roughened surface, will ensure that the paint adheres / sticks. |
|
 |
| |
|
|
|
|
| |
|
|
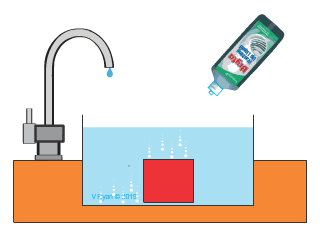
| 2. Clean the surface in warm water, which must include a mild detergent, removing grease, dust and even finger prints. Allow the plastic to dry completely. Any moisture that is left, will prevent the paint making contact with the surface, leaving gaps in the finish. |
|
 |
| |
|
|
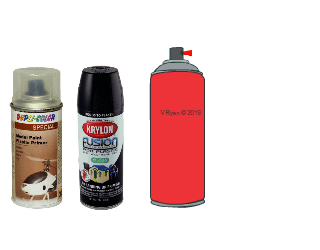
3. Select your spray paints carefully. Ensure that they are suitable for plastics. If they are not, they may damage and even melt the surface. Acrylic sprays are often the best choice, but spray a test area first, before committing to spraying the entire surface.
The surface must be sprayed with primer paint first, allowed to dry completely, and then finished with a top coat. |
|
 |
| |
|
|
|
|
| |
|
|
| If large areas are to be sprayed, then the equipment shown below is used. This involves using a compressor and spray gun (with reservoir of thinned paint). The air pressure forces paint out of the spray gun, as a fine, uniform mist. |
| |
 |
| |
|
|
| |
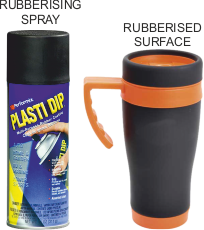
| RUBBERISING SPRAY |
| |
| This is a process whereby UV (Ultra Violet) resistant acrylic rubberising compound, is applied to the surface. This has a number of advantages including, providing a slip resistant surface, as well as a surface that has a comfortable feel. This type of surface is ideal for handheld devices such as TV remote controls, and similar products. It also produces a surface that it is non-conductive. It does not crack or shrink, reduces vibration and dampens sound. It adheres to most materials including plastics. It can even be purchased in a spray can for small scale use. |
|
 |
| |
| |
| CLICK HERE FOR FINISHES TO MATERIALS INDEX PAGE |
| |
|
| |
|