| |
| CLICK HERE FOR INDEX PAGE |
| |
| T-SQUARE AND SET SQUARE EXERCISE |
| V. Ryan © 2008-2014 |
| |
| PDF FILE - CLICK HERE FOR PRINTABLE EXERCISE |
| |
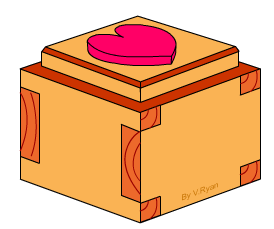
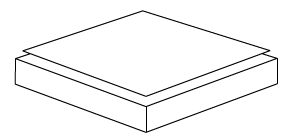
| The jewellery box shown opposite has been manufactured
in a school workshop. Before being manufacture it was designed and drawn
using drawing equipment including a T-square and a 60/30 degree set
square. The stages involved in constructing the ‘isometric drawing are
shown below. |
|
 |
| |
|
|
| |
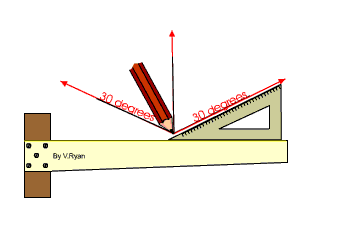
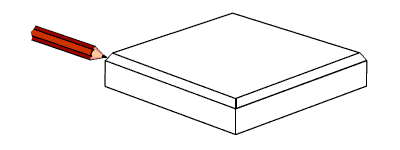
| 1. Draw two basic 30 degree guidelines, one to the left
and one to the right, plus a vertical guideline in the centre of the
drawing. In this example three edges of the box have been drawn over the
guidelines (they are slightly darker) |
|
 |
| |
|
|
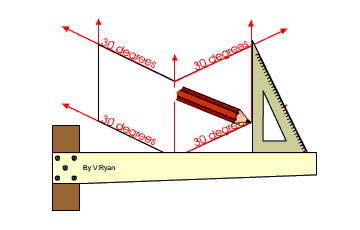
| 2. Draw guidelines to help start constructing the left
and right sides of the jewellery box. Remember to use a 30 degree set
square for the 'angled' lines. |
|
 |
| |
|
|
|
|
| |
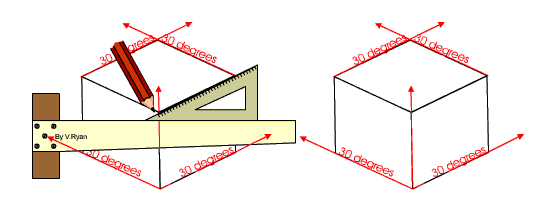
| 3. The top of the jewellery box can be drawn quite
easily by using the set square to draw one edge of the top and then
‘flipping’ it over to draw the other. |
| |
 |
| |
| 4. The basic lid shape is drawn using the same
techniques even though the lid is quite thin. |
|
 |
| |
|
|
| 5. The chamfer is added by first drawing a small
isometric square, floating above the rest of the basic lid. |
|
 |
| |
|
|
| |
|
|
| |
|
|
| |
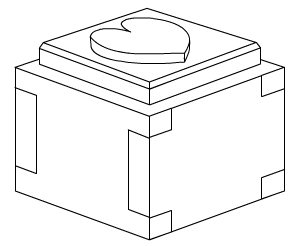
| 6. Add short angles lines from the basic lid to the
left and right hand corners of the isometric square. This produces an
effective chamfer. |
| |
 |
| |
| 7. Add a shape to the top of the lid and also joint
work. The joints shown are simple finger joints. These could be changed to
dovetail joints although this type of joint is much more difficult to
draw. |
|
 |
| |
| 8. Add colour and shade to the jewellery box. Emphasise
the difference between normal grain and the end grain, as seen at the
joints. This can be achieved by applying more pressure to the coloured
pencil. (Click here for shading woods) |
| |
| CLICK HERE FOR GRAPHICS INDEX PAGE |
| |