CLICK HERE FOR INDEX PAGE |
ORTHOGRAPHIC DRAWING - ADVANCED EXERCISE ONE |
V.Ryan © 2023 |
PDF FILE - CLICK HERE FOR PRINTABLE WORKSHEET |
CLICK HERE FOR POWERPOINT VERSION OF WORKSHEET |
ORTHOGRAPHIC DRAWING - COMPLERTE THE DRAWING OF THE COPING SAW |
Select a typical coping saw, from the workshop (as seen below). 
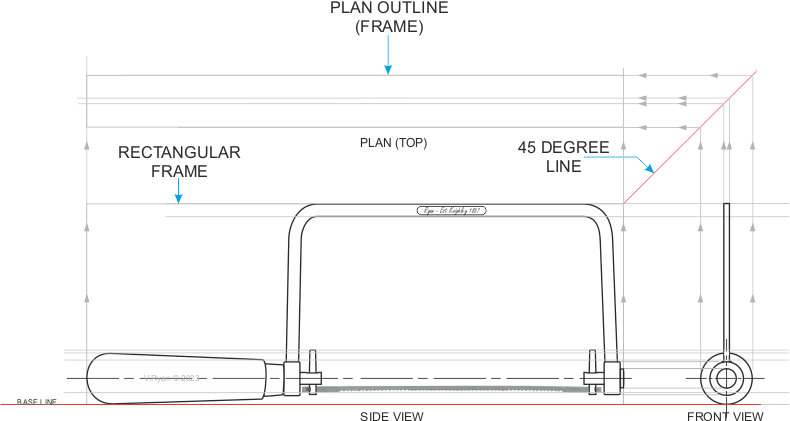
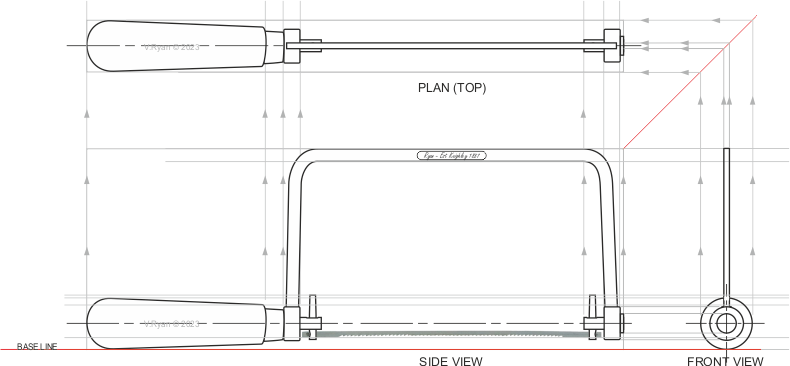
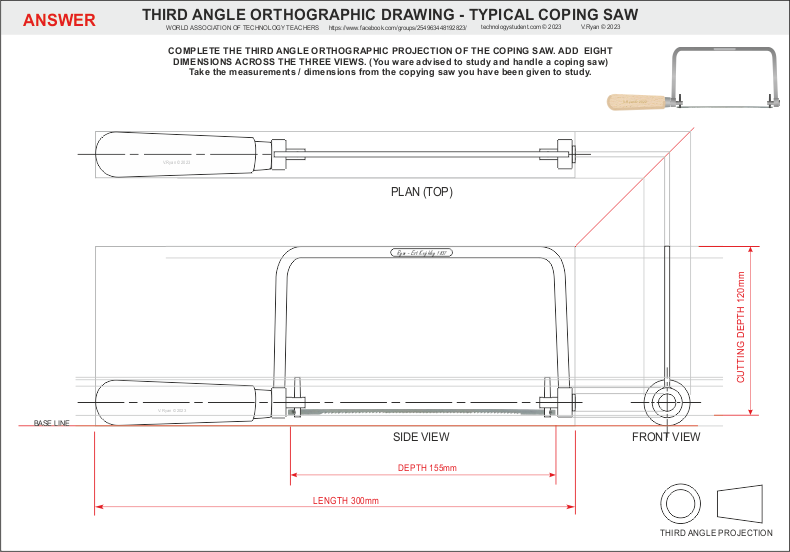
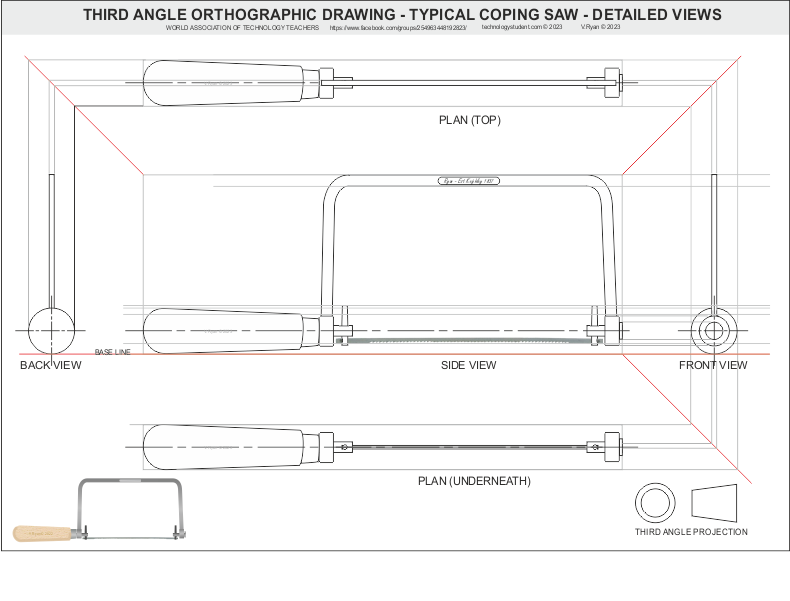
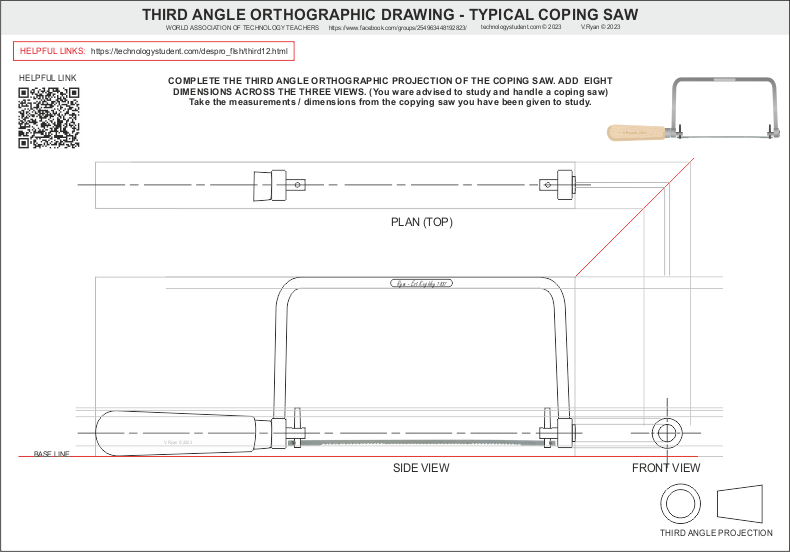
Draw it in Third Angle Orthographic Projection (Front, Side and Plan views) Add at least six dimensions |
![]() |
![]() |
HOW TO COMPLETE THE QUESTION |
STAGE ONE |
Draw the side view of the coping saw. Include a base line and a rectangular frame surrounds the coping saw. 
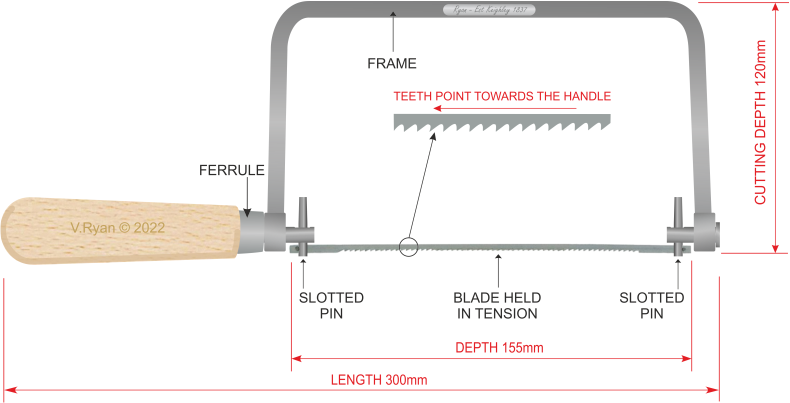
The blade can be drawn in or left out. |
![]() |
STAGE TWO |
To the right of the side view, draw the front view. notice that a ‘centre line’ has been drawn through the handle of the side view and that it continues across the front view. Consider using a circle template to draw the circles that represent the handle and other circular components, on the front view. A compass will be too ‘fiddly’ to use accurately. 
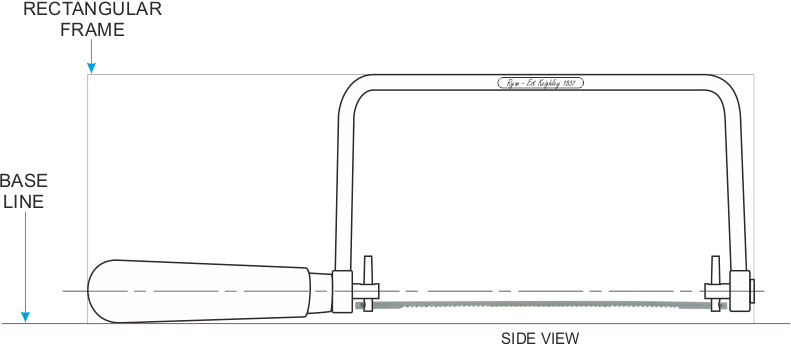
Draw faint, horizontal guidelines to ensure all the components on the side view line up, when they are drawn on the front view. |
![]() |
STAGE THREE |
Draw a 45 degree line from the top right corner of the rectangular frame, that has already been drawn around the side view. Use the 45 degree line to ‘project’ guidelines from the front view, helping to form the outline of the plan view |
![]() |
STAGE FOUR |
Add the rest of the detail to the plan view. remember to project guidelines up from the side view and the front view. These will ensure that the components on each view line up and are in the correct positions. Complete the plan view. |
![]() |
THE ANSWER |
![]() |
The Coping Saw could be drawn with a more 'views' - an additional plan (view from below) and an extra side view. |
![]() |
CLICK HERE FOR GRAPHICS INDEX PAGE |
|