| CLICK HERE FOR INDEX PAGE |
| |
| RADIAL ARM DRILL |
| V.Ryan © 2019-2021 |
| |
| PDF FILE - CLICK HERE FOR PRINTABLE WORKSHEET |
|
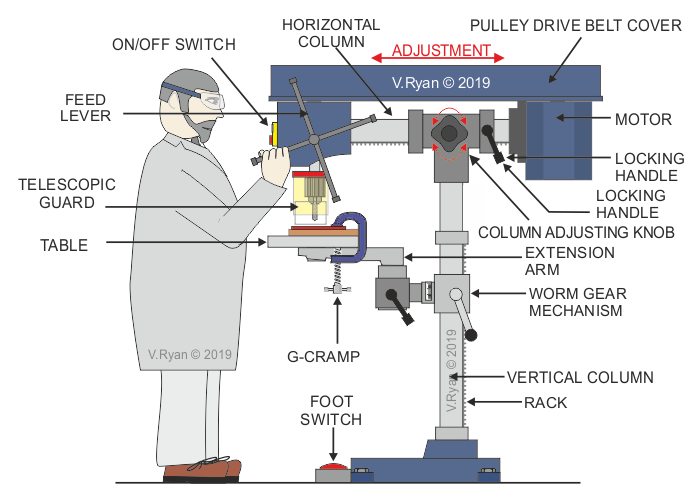
| The Radial Arm Drill, looks similar to a normal machine drill. However, it differs in a variety of ways. The main difference, is that the distance between the drill chuck and the pedestal / vertical column, can be adjusted. This means that large sizes of material, can be set up on the table, for precise drilling. The horizontal column is moved by turning the column adjusting knob. The horizontal column is then locked in position, using the locking handle. |
| |
 |
| |
| INDUSTRIAL HEAVY DUTY RADIAL ARM DRILL |
| |
 |
| |
|
|
| |
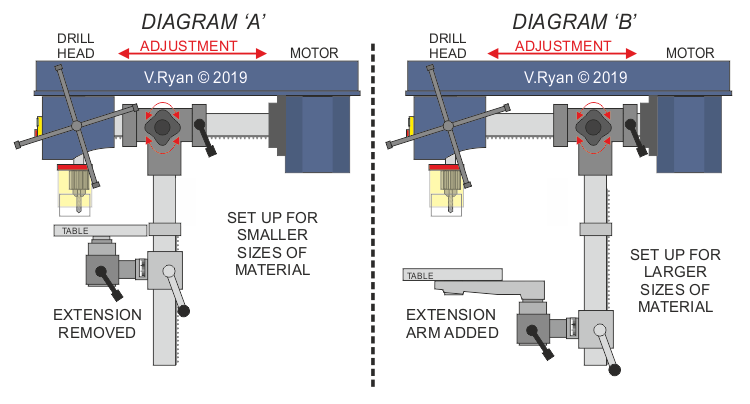
| The diagrams below, demonstrate the range of adjustment for the drill head. Diagram ‘A’ shows the drill head close against the vertical column. Diagram ‘B’ shows the full extension of the drill head, allowing large sizes of material to be placed on the table . |
| |
 |
| |
|
|
| |
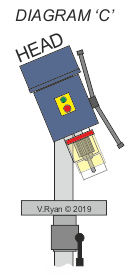
| Diagram ‘C’ - The head of the drill can be adjusted, so that it can be set at a range of angles. It must be locked in position before drilling takes place. |
|
 |
| |
|
|
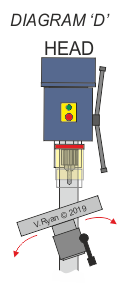
| Diagram ‘D’ - The table can be set to a range of angles, which is useful if an ‘angled’ hole is required. The table must be locked in position when drilling. |
|
 |
| |
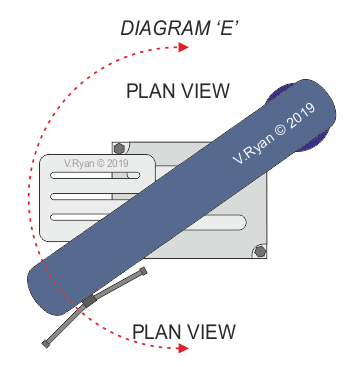
| DIAGRAM ‘E’: The plan view shown opposite, shows one more way the radial arm drill can be adjusted. The pulley drive arrangement and drill head can be rotated and locked in a new position. |
| |
 |
| |
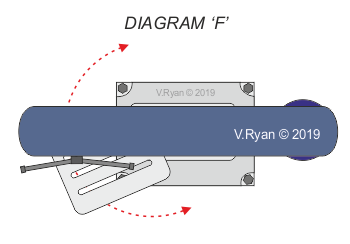
| DIAGRAM F: The drill table can also be set to a range of ‘horizontal’ angles. |
| |
 |
| |
|
|
| |
| SETTING UP THE MATERIAL SECURELY FOR DRILLING |
| |
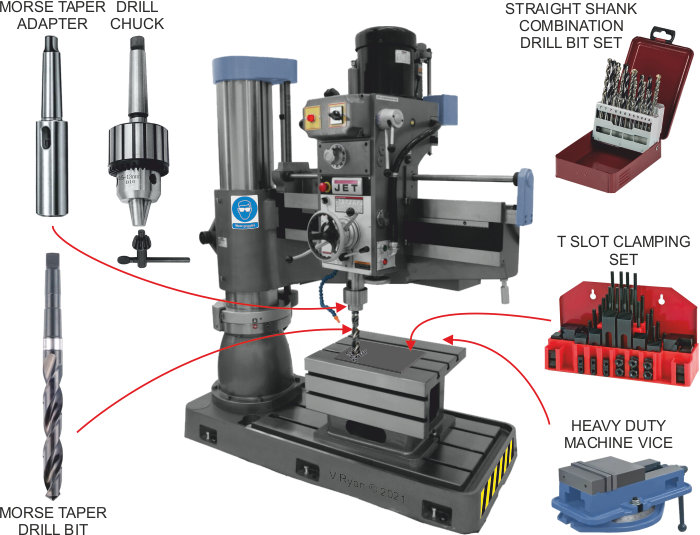
Large diameter drills tend to have their own morse taper and adapter. The drill bit fits into the morse taper adapter and then into the spindle of the radial arm drill. A drill chuck is only used for smaller drill bits, normally 9mm diameter and less.
Material for drilling can be secured in a heavy duty machine vice or with T Bolts and clamps. |
| |
 |
| |
| |
| CLICK HERE FOR EQUIPMENT AND PROCESSES INDEX PAGE |
| |
|
| |
|