V.Ryan © 2022
| CLICK HERE FOR INDEX PAGE | ||
| HOW TO MARK OUT AND CUT A COMPLEX SET OF FINGER JOINTS | ||
V.Ryan © 2022 |
||
| PDF FILE - CLICK HERE FOR INTRUCTION SHEET / POSTER - MARKING OUT AND CUTTING COMPLEX FINGER JOINTS | ||
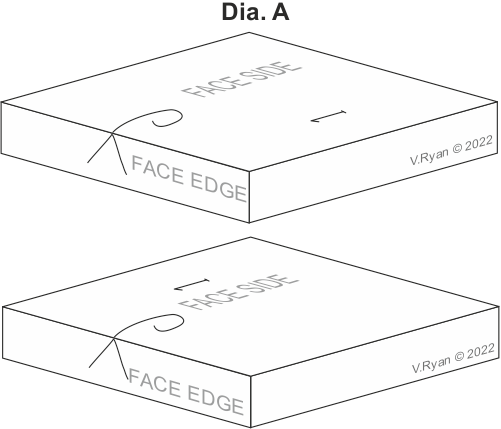
| Mark the face side and face edge on both pieces of wood. These are the edges you will work from when marking out the joint. Mark ‘1' on each piece as shown below | ||
|
||
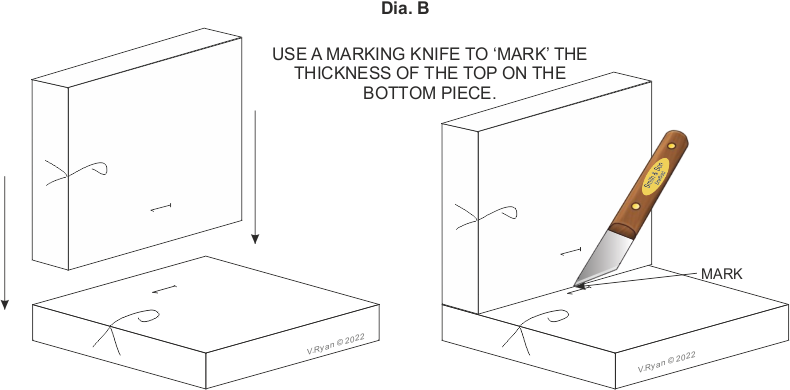
| Align the two pieces as shown below. Ensure that the numbers are next to each other and the face edges line up. | ||
|
||
| Use a try square and marking knife to draw a line around the wood (all four sides), starting at the ‘mark’. But the stock of the try square against the face edge | ||
|
||
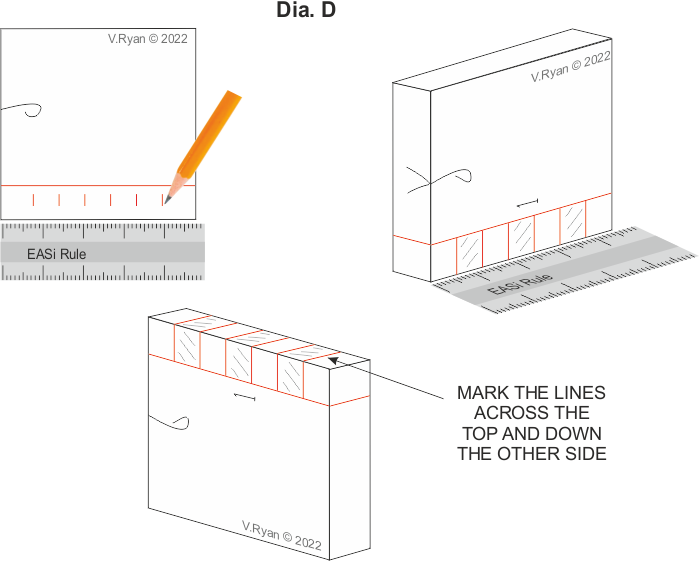
| Divide the end of one piece into six equal divisions. | Use a try square and pencil to mark on the ‘fingers’. Shade the areas to be removed. | |
|
||
| Saw down to the depth line. Take care to saw on the ‘waste wood’ side of the lines. | ||
|
||
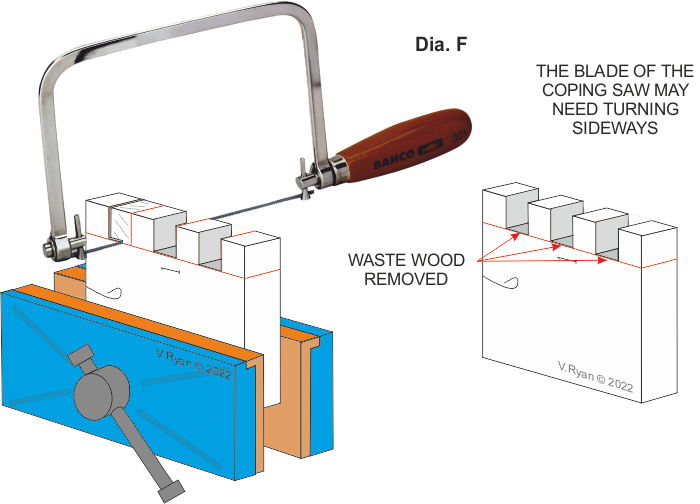
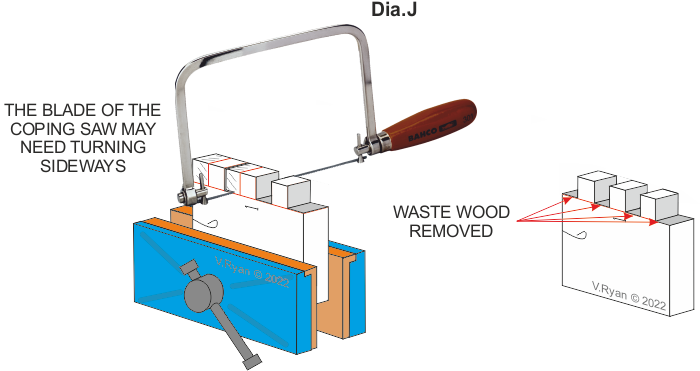
| Use a coping saw to remove the waste wood, cutting along the depth line of each ‘finger’. | ||
|
||
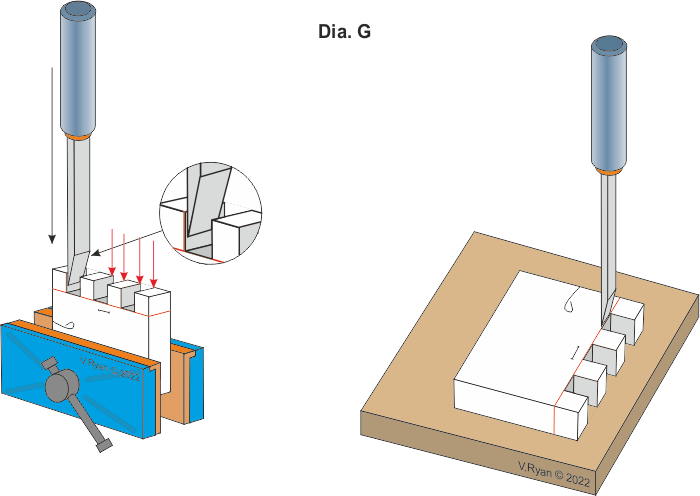
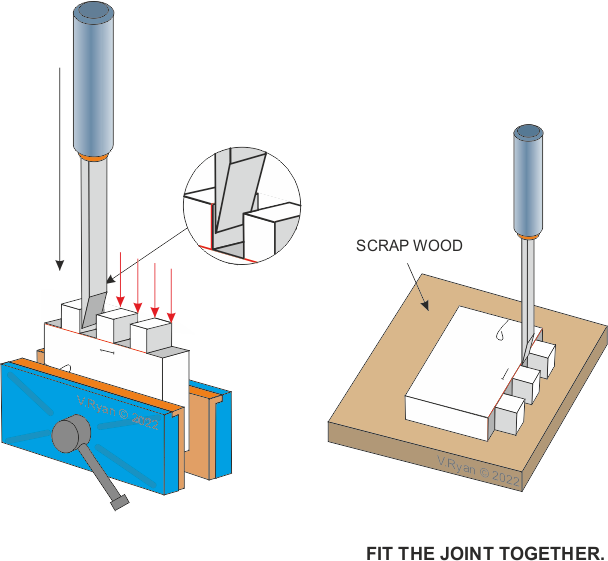
| Straighten the edges of each ‘finger’, with a bevel edged chisel, tapped with a mallet or pushed by hand. | ||
|
||
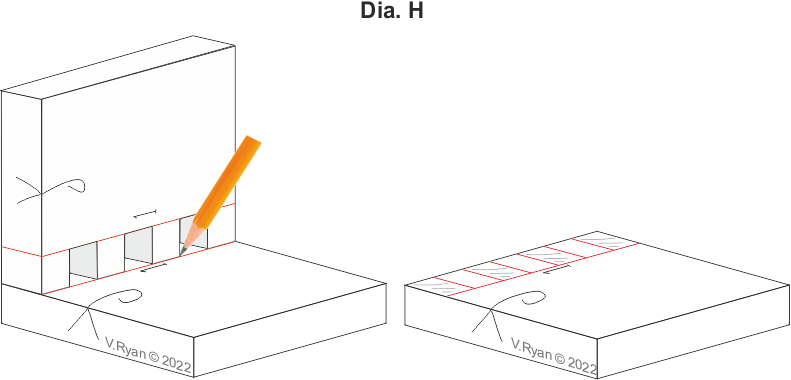
| Take the completed set of fingers and place them on the second piece. Use a sharp pencil to mark the next set of fingers. Shade the waste wood. | ||
|
||
| Saw down to the depth line. Take care to saw on the ‘waste wood’ side of the lines. | ||
|
||
| Use a coping saw to remove the waste wood, cutting along the depth line of each ‘finger’. | ||
|
||
| Straighten the edges of each ‘finger’, with a bevel edged chisel, tapped with a mallet or pushed by hand. | ||
|
||
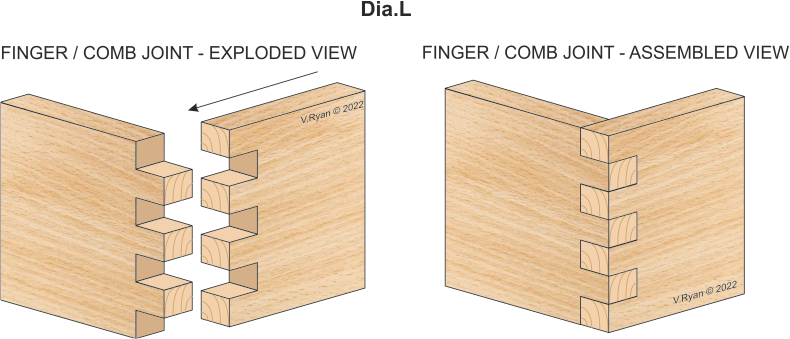
| Fit the two parts of the joint together and test for a good ‘woodworking joint’. | ||
|
||
| CLICK HERE FOR RESISTANT MATERIALS INDEX PAGE | ||
|
||