| CLICK HERE FOR INDEX PAGE |
| |
| STOPPED HOUSING JOINT |
V.Ryan © 2022 |
| |
| PDF FILE - POSTER - MARKING OUT AND CUTTING A STOPPED HOUSING JOINT |
| |
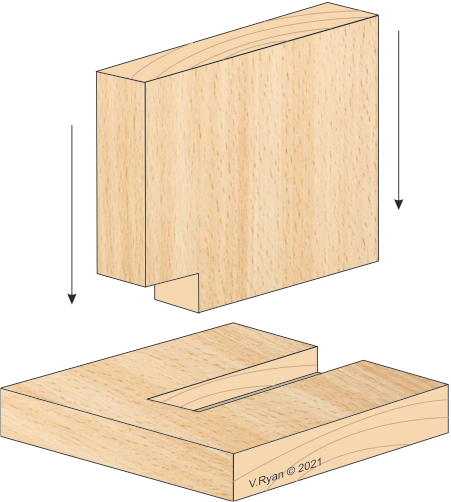
A stopped housing joint, is slightly more complicated than a through housing joint.
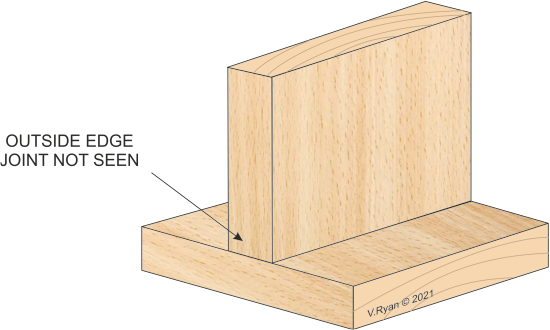
The advantage of this housing joint is that it is no seen on the outside edge, because the housing stop short and is consequently hidden.
This type of joint is ideal for shelving and panels. |
| |
| EXPLODED VIEW |
| |
 |
| |
| ASSSEMBLED VIEW |
| |
 |
| |
|
|
| |
| HOW TO MARK OUT AND CUT A STOPPED HOUSING JOINT |
| |
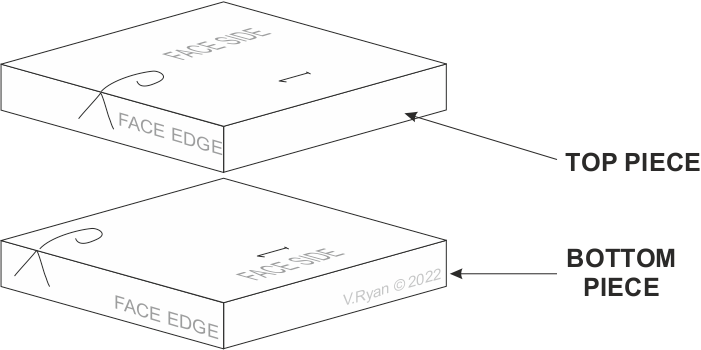
| Mark the ‘face side’ and ‘face edge’ on both pieces of wood. These are the edges you will work from, when marking out the joint. Mark ‘1' on each piece, as shown below. |
| |
| Dia. A |
| |
 |
| |
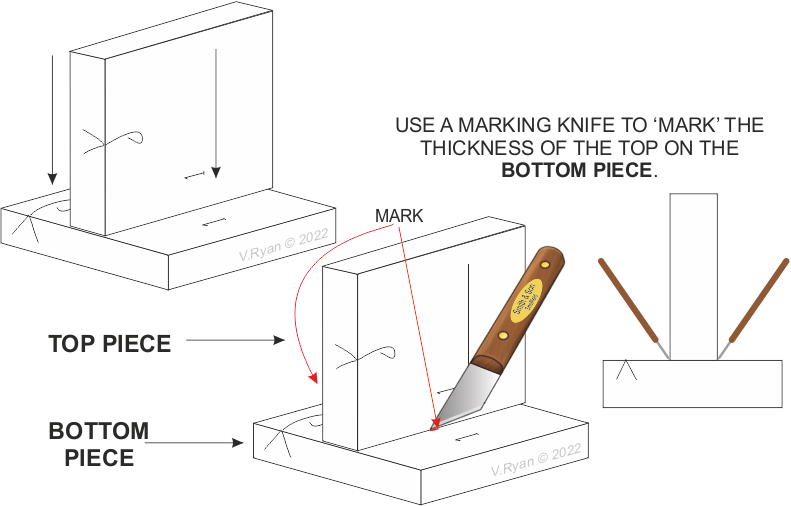
| Align the two pieces. Ensure that the numbers are next to each other and the ‘face edges’ line up. |
| |
| Dia. B |
| |
 |
| |
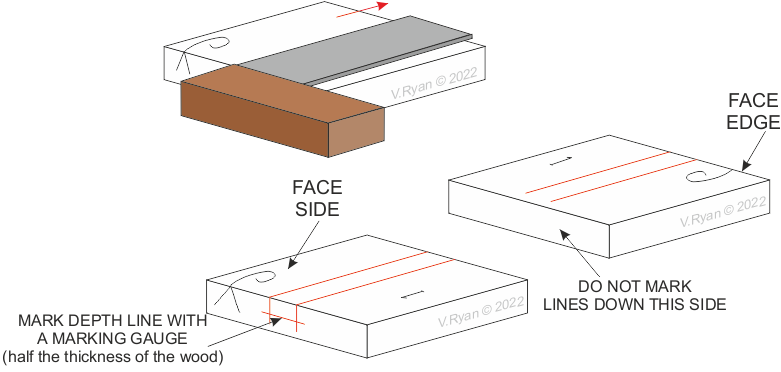
| On the bottom piece only - use a try square and marking knife, to mark two lines across the face side and down one of the edges. Place the stock of the try square against the ‘face edge’. |
| |
Dia. C
BOTTOM PIECE |
| |
 |
| |
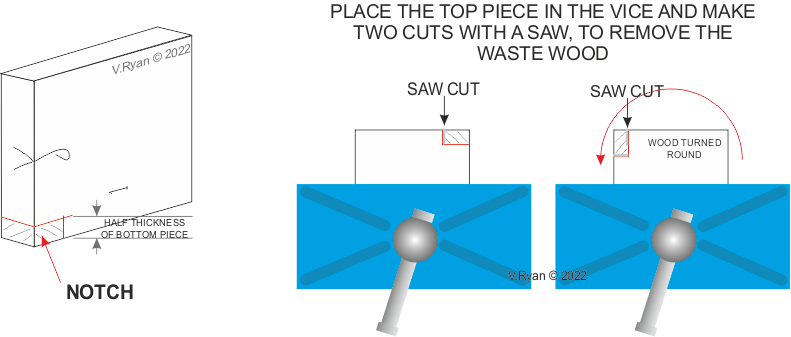
The depth of the ‘notch’ is normally half the thickness of the bottom piece.
Mark out the ‘notch’ as shown below, using a try square.
Some people also use a marking gauge. |
| |
Dia. D
TOP PIECE |
| |
 |
| |
|
|
| |
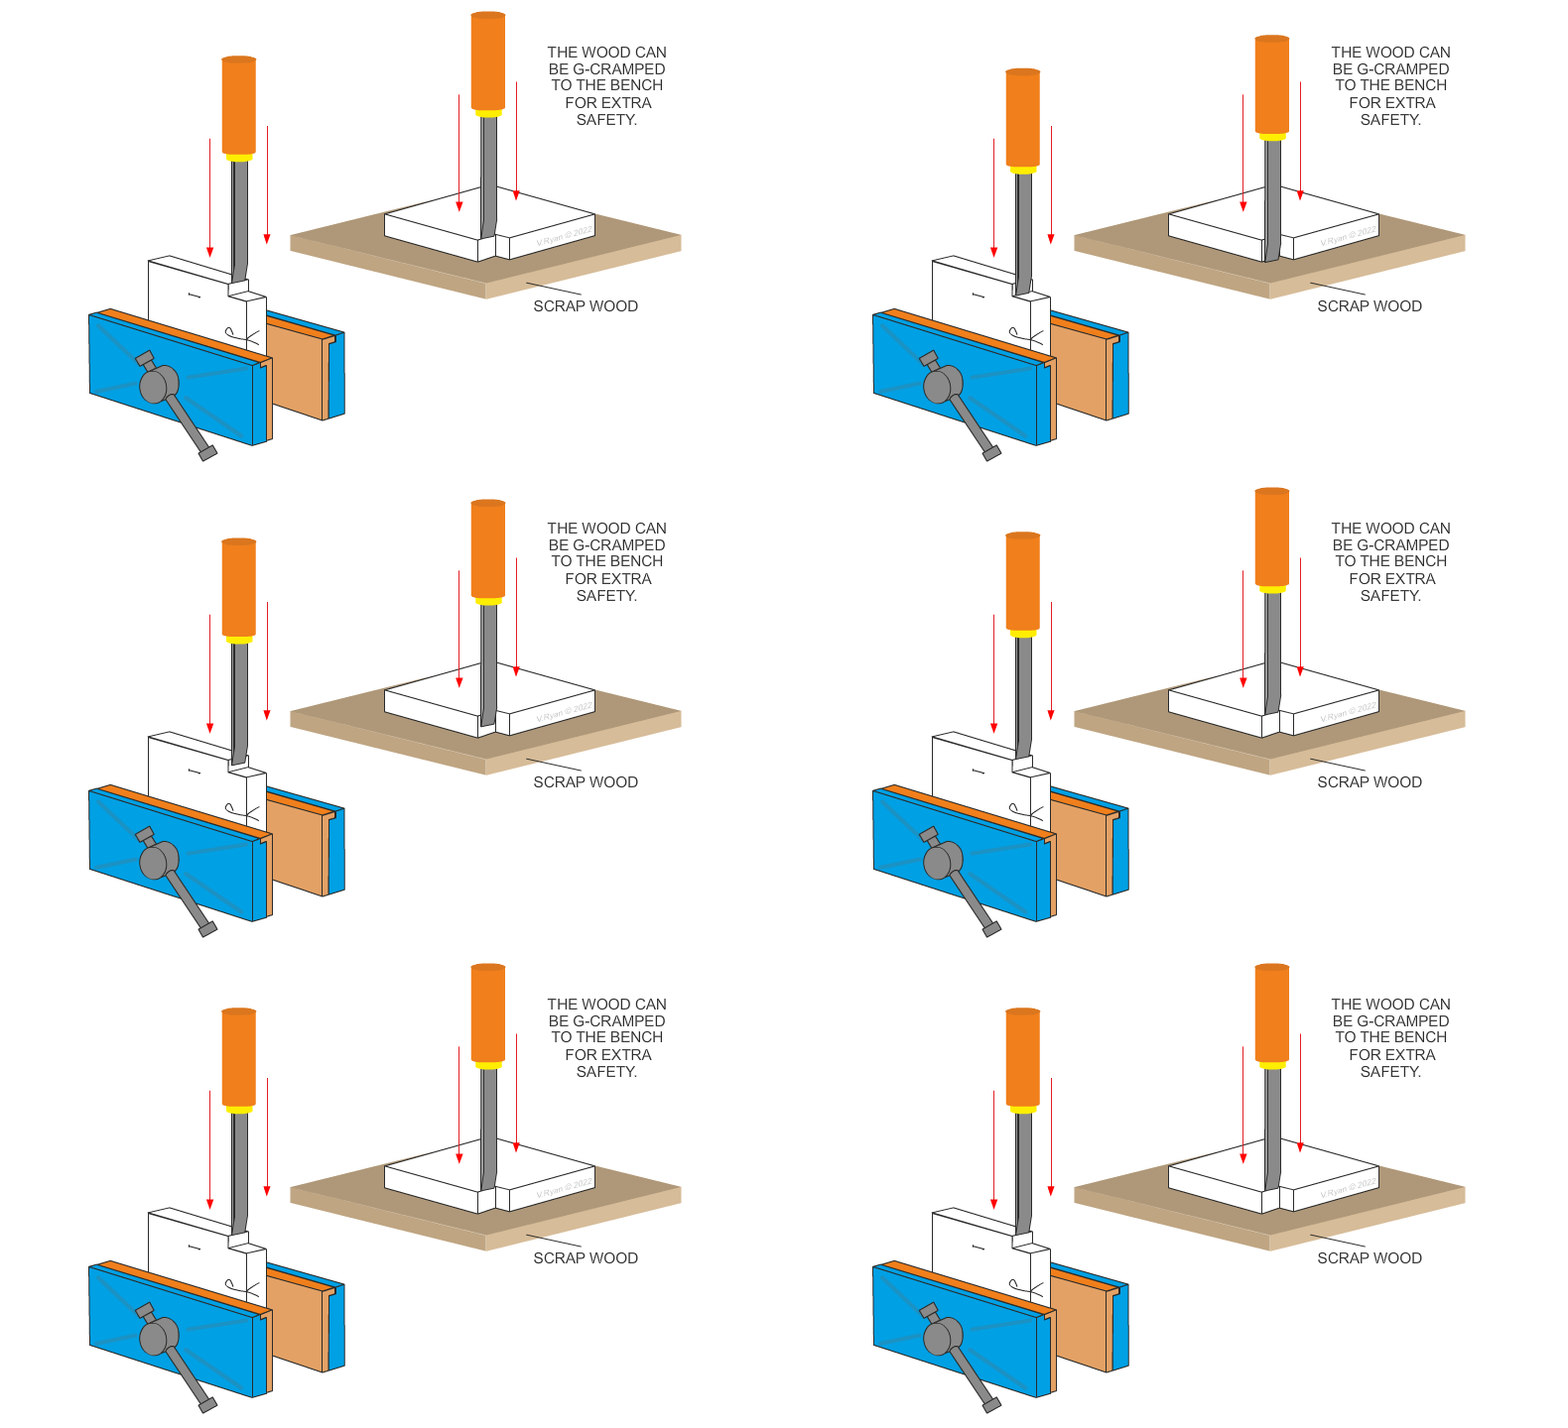
| Use a bevel edged chisel, to make the final cuts. Use a combination of chiselling with the work in a vice and placed on top of scrap wood, secured to the bench surface. |
| |
Dia. E
TOP PIECE |
| |
 |
| |
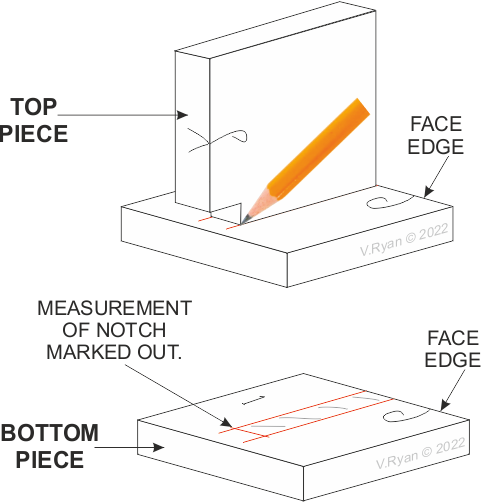
| Place the top piece on the bottom piece and mark the measurement of the ‘notch. Use a pencil or if possible, a marking knife. |
| |
| Dia. F |
| |
 |
| |
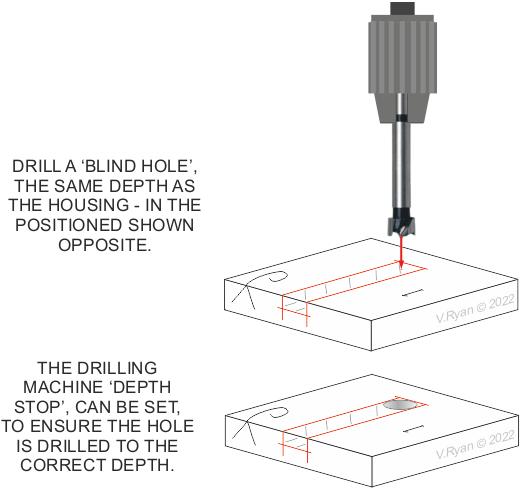
Set up the wood on the drilling machine. Ensure that it is held in a vice or secured directly to the drilling table.
Select a forstner bit - it should be the width or close to the width, of the housing to be cut. |
| |
BOTTOM PIECE
Dia. G |
| |
 |
| |
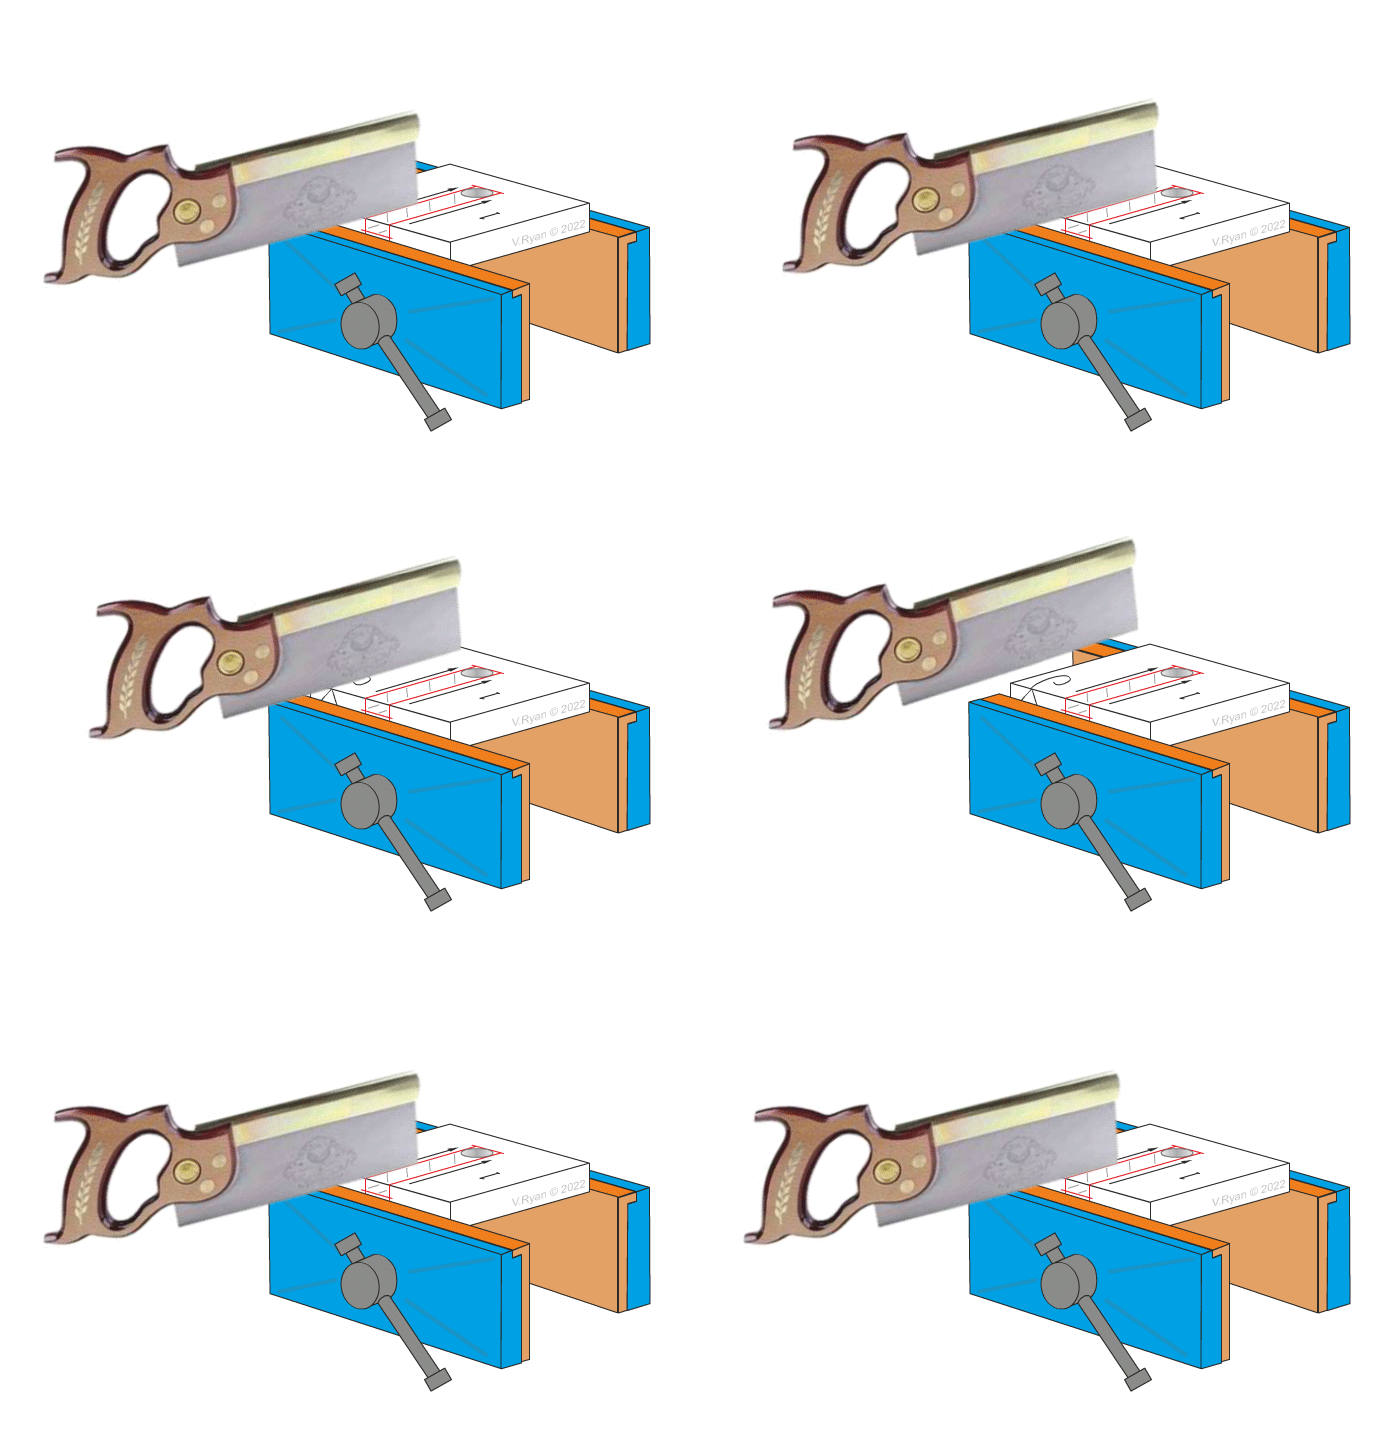
Use a dovetail saw / tenon saw, to saw inside the waste wood lines, to the depth of the housing.
Great care and patience are needed, because only short, sawing strokes can be made. |
| |
| Dia. H |
| |
 |
| |
|
|
| |
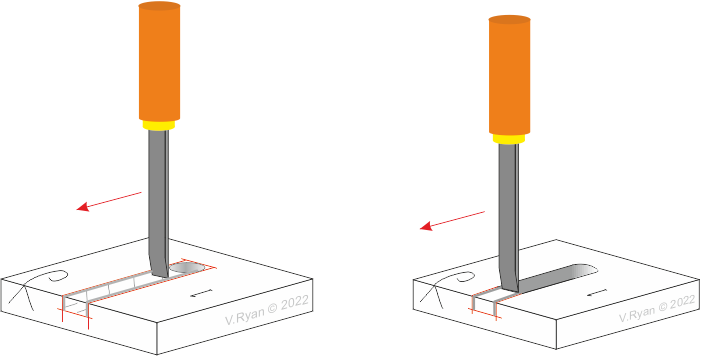
Carefully chisel to remove the waste wood. Start at the blind hole, working slowly to the end of the groove.
A combination of chiselling downwards and parring the wood, is usually required. |
| |
| Dia. I |
| |
 |
| |
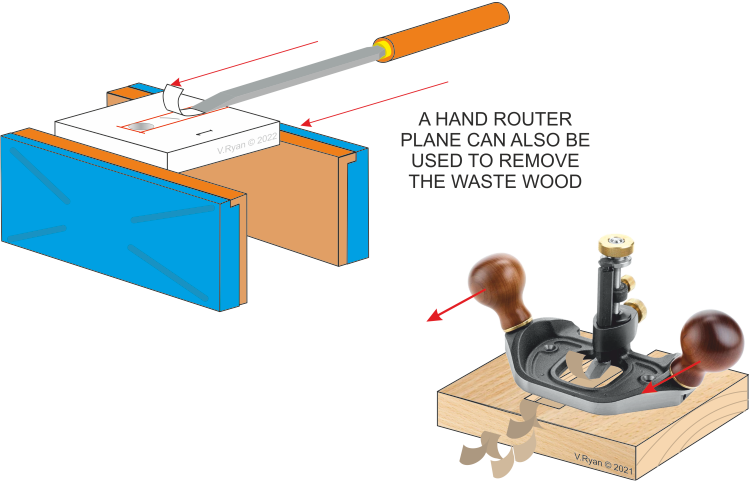
| Securing the wood in a vice and ‘parring’ the waste wood with a chisel, is another way of removing the waste. A mallet can be used to apply the ‘force’, or push the chisel by hand. |
| |
 |
| |
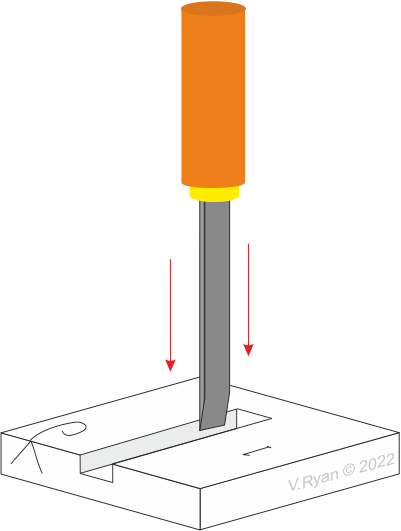
For the final ‘cuts’ with the chisel, place its cutting edge, in the knife lines produced when marking out the joint.
Tap the chisel with a mallet, removing fine cuts of wood.
This should produce an accurate joint. |
| |
| Dia. J |
| |
 |
| |
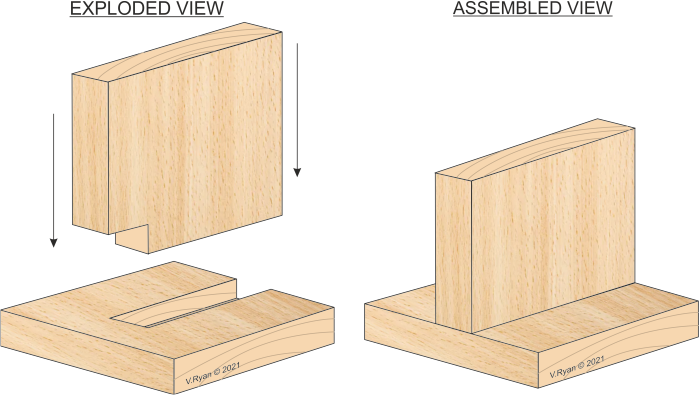
| FIT THE FINISHED JOINT TOGETHER |
| |
 |
| |
| |
| CLICK HERE FOR RESISTANT MATERIALS INDEX PAGE |
| |
|
| |
|


