| CLICK HERE FOR INDEX PAGE |
| |
| SINGLE SIDED DOVETAIL HOUSING JOINT |
V.Ryan © 2022 |
| |
| PDF FILE - POSTER - MARKING OUT AND CUTTING A SINGLE SIDED DOVETAIL HOUSING JOINT |
| |
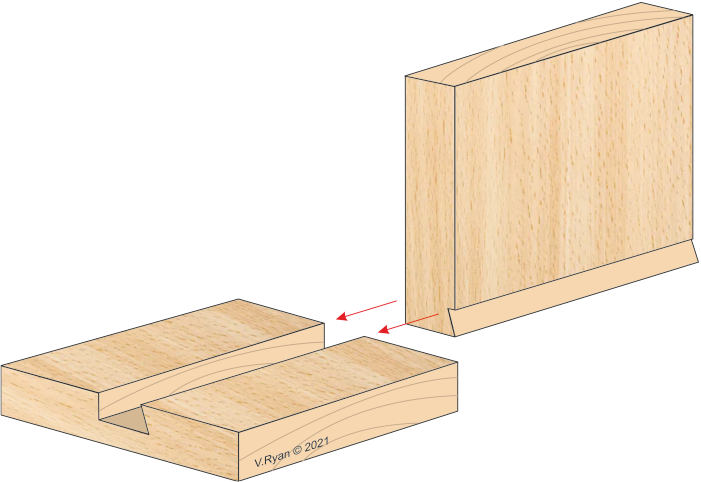
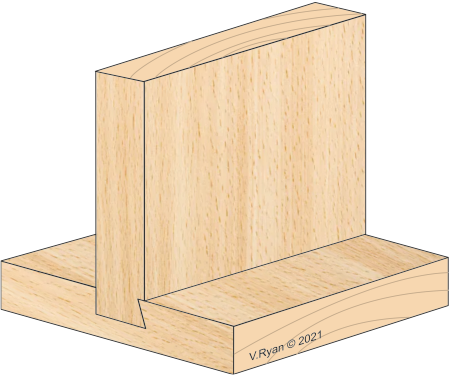
A single sided dovetail housing joint, is stronger than a through and stopped housing. The angled dovetail prevents the joint pulling apart.
This housing joint must be marked and cut very accurately, because the dovetailed part slides into the housing joint, from the side. Inaccuracy may make it difficult or even impossible to assemble the joint.
This type of joint is ideal for shelving and panels. |
| |
| EXPLODED VIEW |
| |
 |
| |
| ASSEMBLED VIEW |
| |
 |
| |
|
|
| |
| HOW TO MARK OUT AND CUT A SINGLE SIDED DOVETAIL HOUSING JOINT |
| |
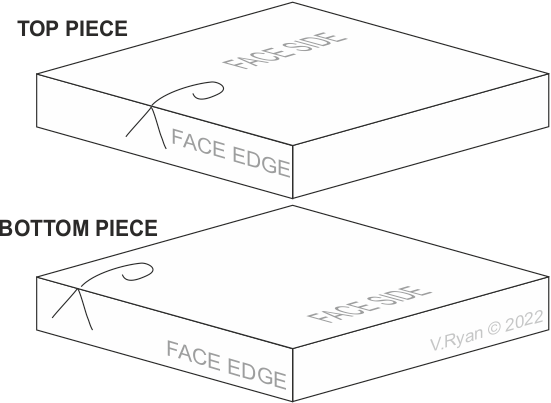
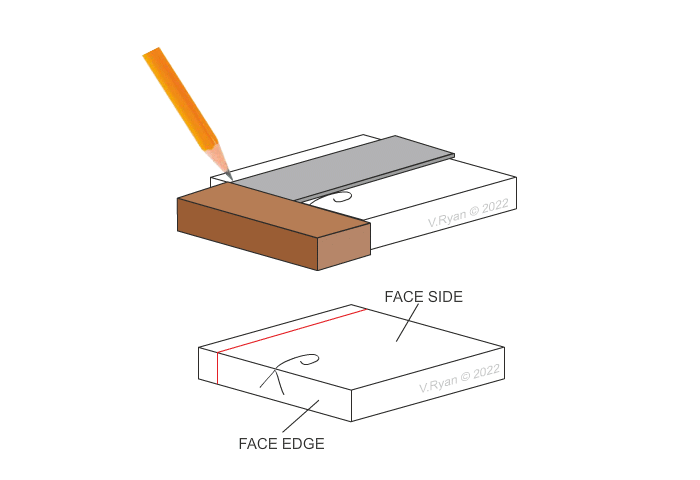
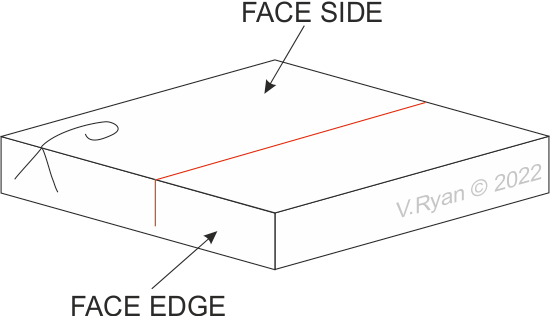
| Mark the ‘face side’ and ‘face edge’ on both pieces of wood. |
| |
| Dia. A |
| |
 |
| |
| Mark the depth of the dovetail around the wood, with a pencil. This is called the shoulder line. |
| |
TOP PIECE
Dia. B |
| |
 |
| |
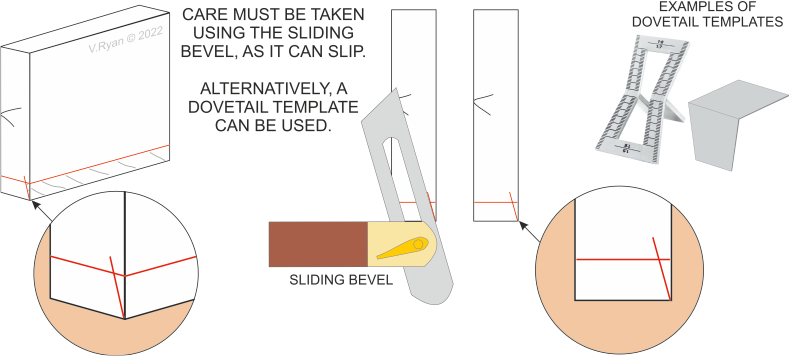
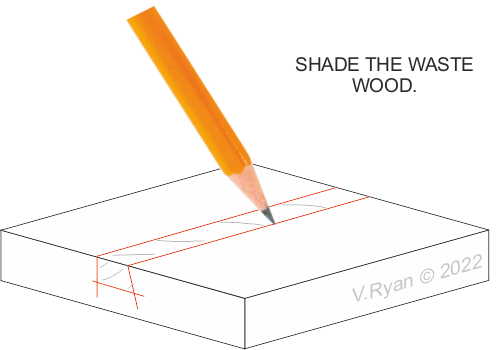
Add the ‘angle’ of the dovetail, using a sliding bevel.
Shade the waste wood. |
| |
| Dia. C |
| |
 |
| |
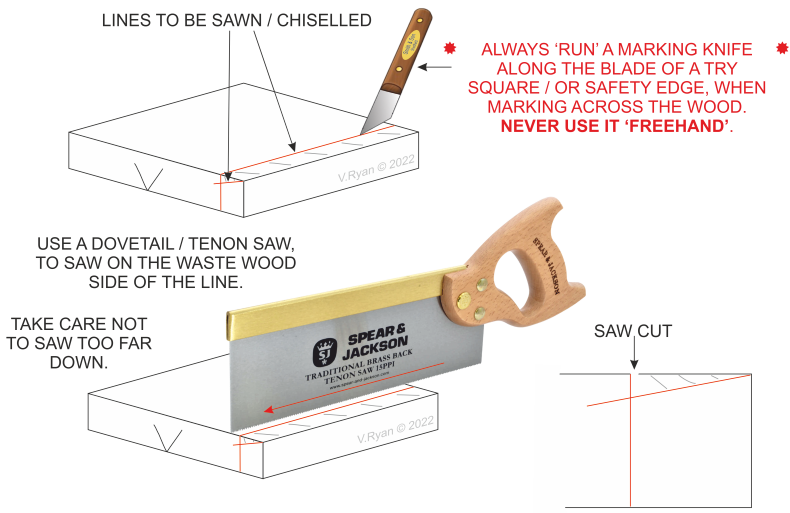
| Use a marking knife to ‘score’ over the lines, that will be sawn / chiselled |
| |
| Dia. D |
| |
 |
| |
| G-clamp the wood securely and ‘pare’ away the waste wood, with a chisel. |
| |
| Dia. E |
| |
 |
| |
|
|
| |
Mark the position of the top piece on the bottom piece, using a try square.
A single line is required at this stage. |
| |
Dia. F
BOTTOM PIECE |
| |
 |
| |
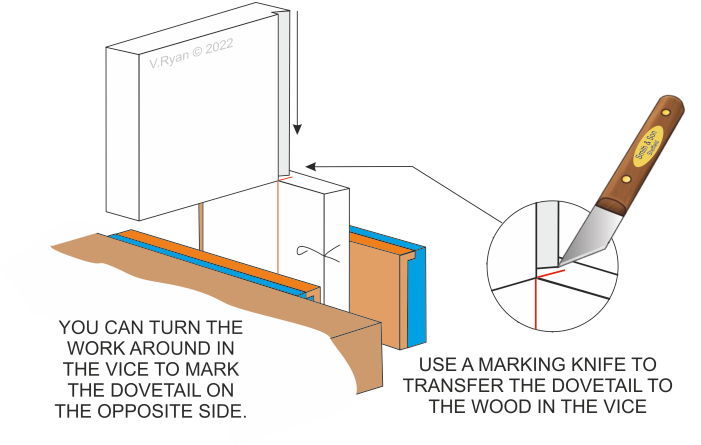
| Secure the bottom piece in a vice and lower the completed dovetailed piece, so that it ‘lines up’ with the ‘marking out line. |
| |
| Dia. G |
| |
 |
| |
Continue the marking out lines across and down the other edge. Use a try square.
Go over the lines with a pencil so that they are easy to see. |
| |
| Dia. H |
| |
 |
| |
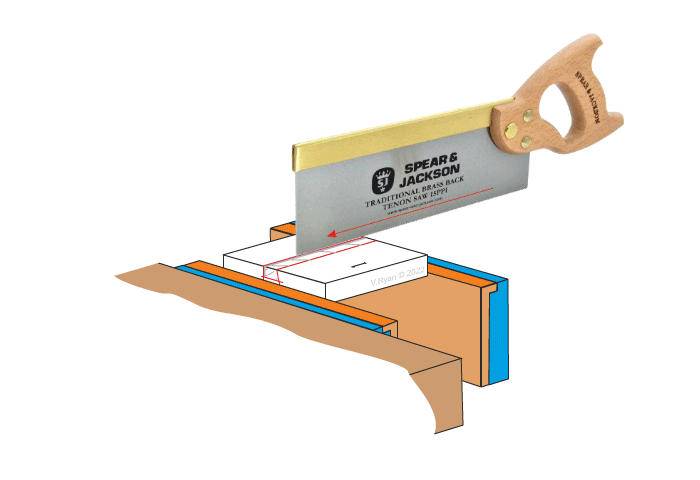
| Secure the wood in a vice. Saw down, cutting on the waste wood side of the vertical line. |
| |
| Dia. I |
| |
 |
 |
| |
|
|
| |
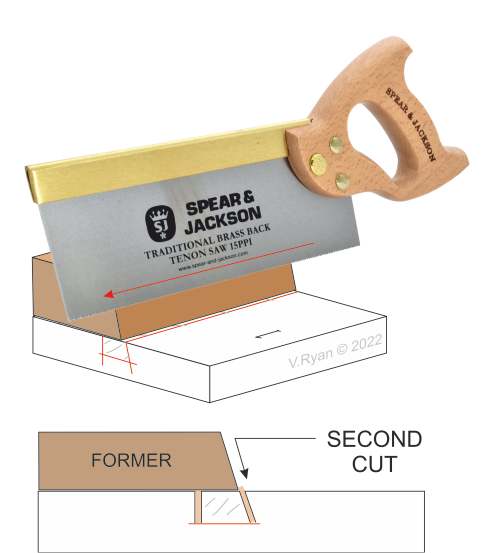
| The angled cut, can be made by tilting the saw at the dovetail angle or a former, already cut to the correct angle, can be used to support the saw. Both pieces are g-clamped to the bench. |
| |
| Dia. J |
| |
 |
| |
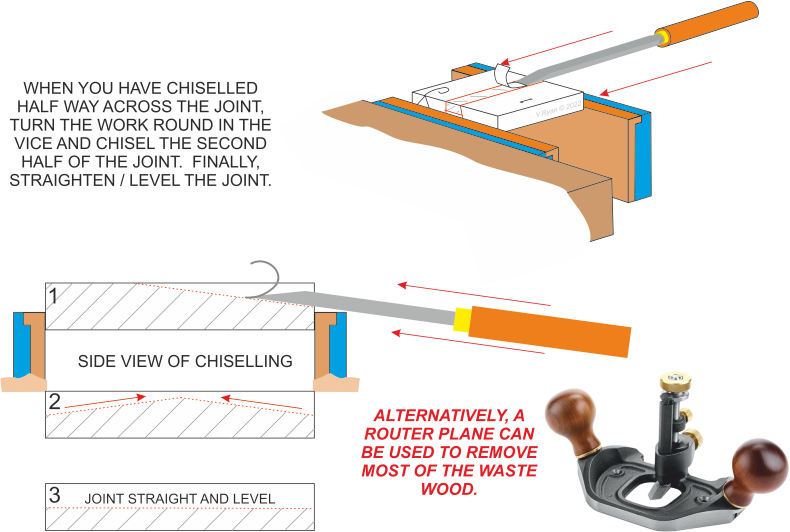
Slowly remove the waste wood with a chisel (bevel edged preferred), working upwards and towards the centre (see dia 1, 2 & 3 below).
Do not chisel all the way across, as this can split the wood, at the far side. |
| |
| Dia. K |
| |
 |
| |
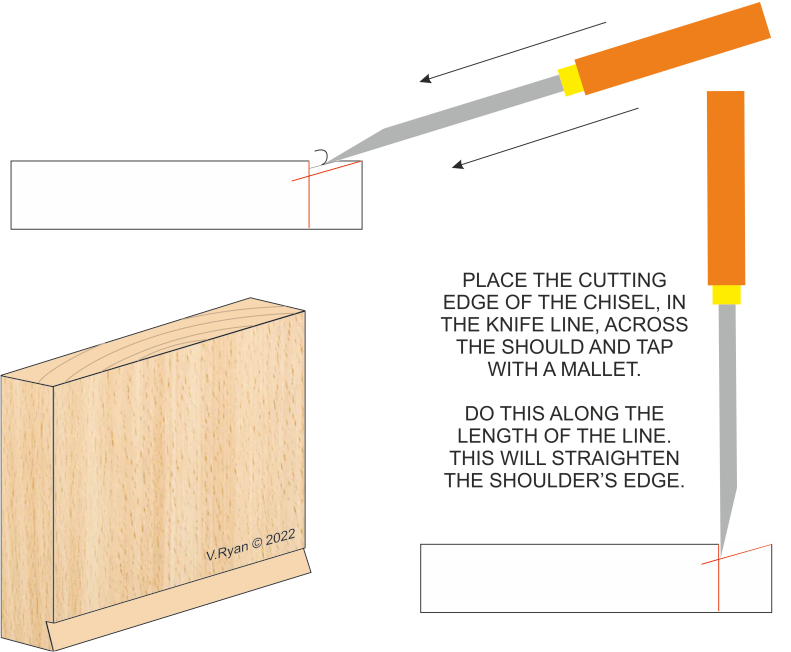
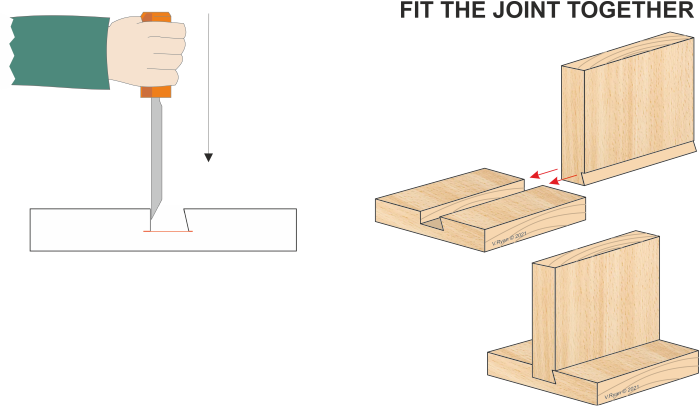
| If required, the vertical line of the shoulder can be trimmed with a chisel and mallet. |
| |
| Dia. L |
| |
 |
| |
|
|
| |
| CLICK HERE FOR RESISTANT MATERIALS INDEX PAGE |
| |
|
| |
|