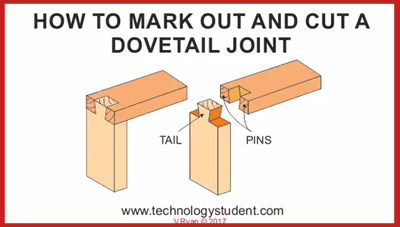
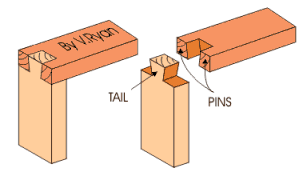
MARKING OUT AND CUTTING A DOVETAIL JOINT
MARKING AND CUTTING THE PINS
| CLICK HERE FOR INDEX PAGE | ||
MARKING OUT AND CUTTING A DOVETAIL JOINT MARKING AND CUTTING THE PINS |
||
| V. Ryan © 2003 - 2008 | ||
| YouTube Video - Marking Out and Cutting a Simple Dovetail Joint | ||
|
||
|
|
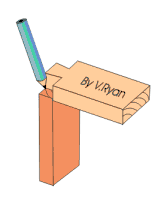
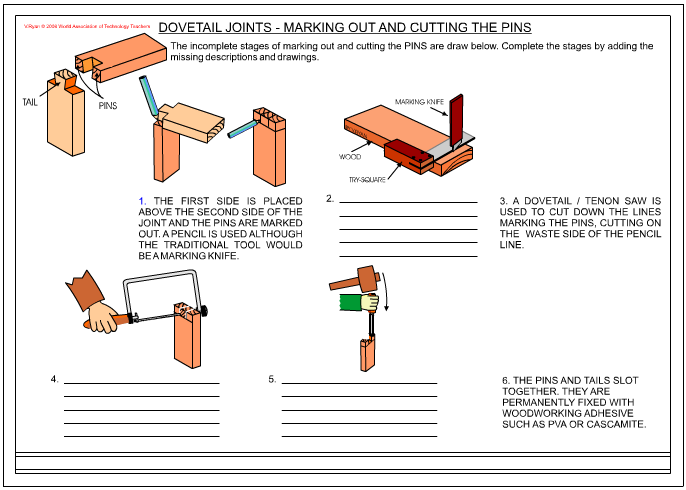
7. The first side is placed above the second side of the joint and the pins are marked out. Again a pencil is used although the traditional tool would be a marking knife. |
|
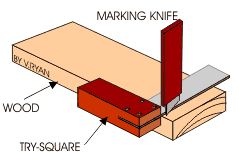
8. Marking out the joint when both pieces are together can be difficult but a steel ruler or a try square can be used to straighten any lines. Again, the waste wood must be clearly identified. | |
|
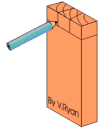
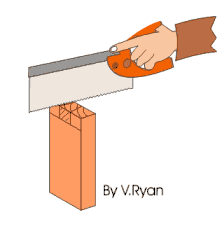
9. A dovetail / tenon saw is used to cut down the lines marking the pins. The wood must be secured in the vice in the same way as before. Remember, the saw is used to cut straight down the joint, on the waste side of the pencil line. | |
|
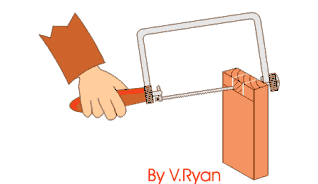
10. A coping saw is used to remove the waste wood. Again the wood is secured in the vice. | |
|
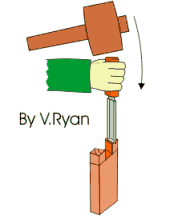
11. A chisel is used to finish the joint, if it is needed. The wood is placed in a woodworkers vice so that it cannot slip. The joint should fit together if care has been taken when marking out and cutting the two sides. | |
|
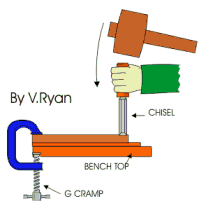
12. If the pin is slightly inaccurate a firmer or bevel edged chisel can be used to correct it. A G cramp is used to hold the wood firmly. Scrap wood is placed underneath to protect the surface of the bench from the chisel. The second side of the joint should now be complete. | |
|
The completed dovetail joint. | |
| PDF FILE - CLICK HERE FOR PRINTABLE VERSION OF EXERCISE SHOWN BELOW | ||
|
||
| CLICK HERE FOR MARKING OUT AND CUTTING THE TAILS | ||
| CLICK HERE FOR RESISTANT MATERIALS INDEX PAGE | ||