| CLICK HERE FOR INDEX PAGE | ||||
| THE MORTISE AND TENON JOINT - THE MORTISE | ||||
| V. Ryan © 2003 - 2008 | ||||
|
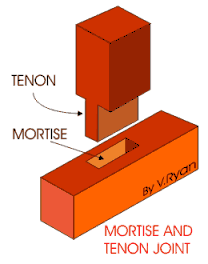
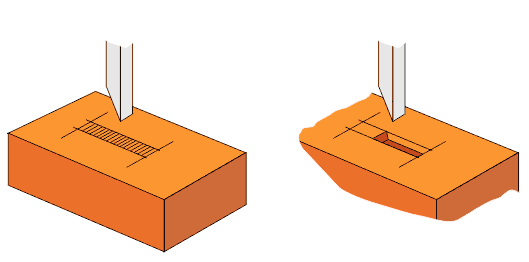
An animation of a plain mortise and tenon joint joint is shown opposite. This type of joint has a wide range of uses and is particularly useful when manufacturing furniture. Several types of mortise and tenon joint exist. (see joints index page). The marking out and cutting of all the mortise and tenon joints are based in this simple joint. Below is a stage by stage account of the marking and cutting of the mortise part of the joint. |
|
|||
|
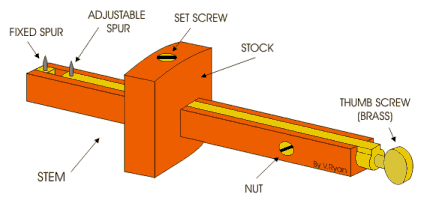
The mortise gauge is a special type of marking gauge
and it is used to mark wood so that a mortise can be cut into it. The
diagram to the above represents a typical mortise and tenon joint. The
mortise is marked out using the mortise gauge although it must be set to
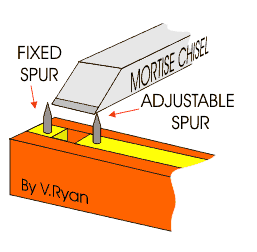
the correct size of mortise chisel very carefully. A mortise chisel is
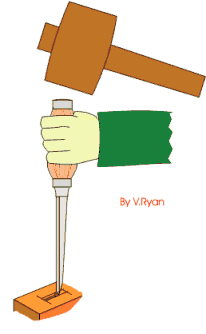
then used to remove the waste wood. |
||||
|
|
||||
|
MARKING OUT THE MORTISE |
||||
|
|
1. The distance between the fixed spur and the adjustable spur is set so that it matches the width of the mortise chisel. The width of the mortise chisel should match the width of the mortise to be cut in the wood. |
|||
|
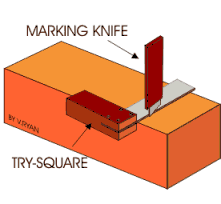
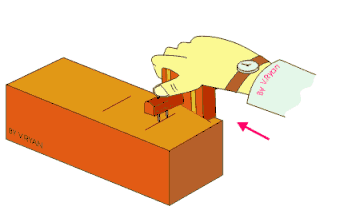
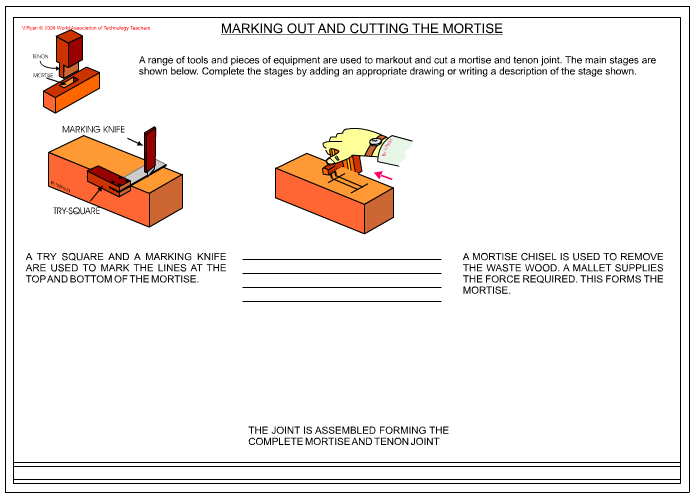
2. A try square and a marking knife are used mark the lines at the top and bottom of the mortise. |
|
|||
|
|
3. The stock of the mortise gauge is pressed against the side of the wood. It is then pushed along the wood until the mortise is marked out correctly. |
|||
|
||||
|
|
||||
|
|
||||
|
PDF FILE - CLICK HERE FOR PRINTABLE VERSION OF EXERCISE SEEN BELOW
|
||||
|
|
||||
|
|
||||
|
QUESTIONS: Using notes and diagrams describe how a mortise gauge is used to mark out the mortise of a mortise and tenon joint. |
||||
|
|
||||