| CLICK HERE FOR INDEX PAGE | |
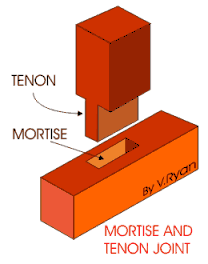
| THE MORTISE AND TENON JOINT - THE TENON | |
| V. Ryan © 2003 - 2008 | |
|
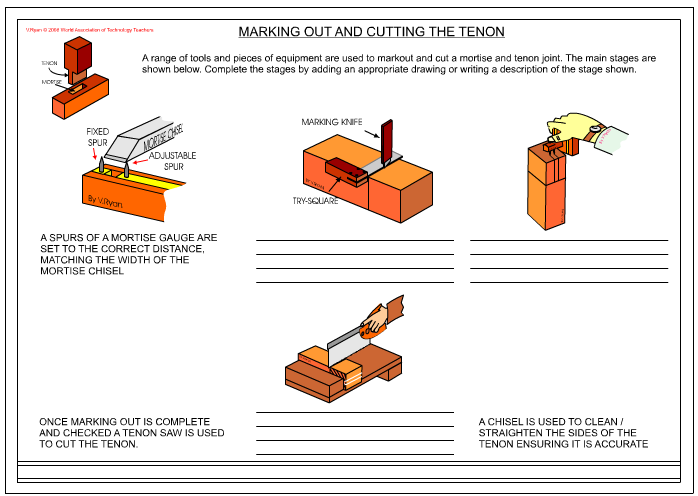
The tenon part of a mortise and tenon joint is marked out and cut with the same tools as are used for the mortise part of the joint. |
|
|
|
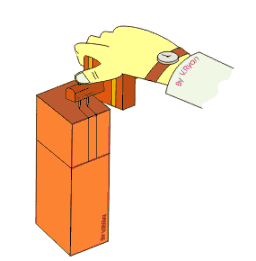
The mortise chisel is carefully selected. It should be the same width as the mortise to be cut into the wood. The fixed spur and the adjustable spur of the gauge are set to the width of the chisel. |
|
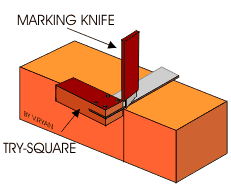
The width of the tenon is marked all the way round the wood. Normally a marking knife is used to produce a precise line, with the aid of a try square. A pencil can then be used make the line stand out. |
|
|
|
The mortise gauge is used to mark the size of the tenon. The stock of the marking gauge must be held firmly against the side of the wood as wit ill have a tendency to follow the grain of the wood rather than a straight line. |
|
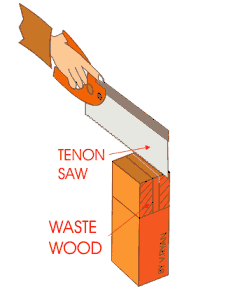
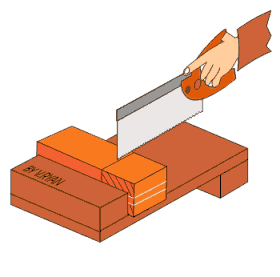
A tenon saw is used saw down the gauged lines of the tenon. The wood is normally held firmly in a woodworkers vice. When sawing, take time to check that the saw is cutting straight down and that it is on the waste wood side of the tenon. |
|
|
|
The wood is then supported by a bench hook and a tenon saw is used to finally remove the waste wood. This leaves the shoulder of the joint. |
|
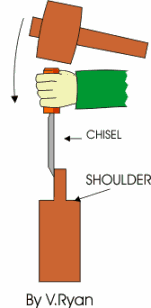
A firmer or bevel edged chisel can be used to remove rough edges and to straighten the tenon. The wood must always be held in a woodworking vice as a chisel my slip if the wood moves. If the marking out and cutting have been carried out accurately the mortise and tenon should fit together forming a firm joint. |
|
|
|
QUESTIONS: |
|
PDF FILE - CLICK HERE FOR PRINTABLE VERSION OF EXERCISE SHOWN BELOW
|
|
|
|
|
|
|
|